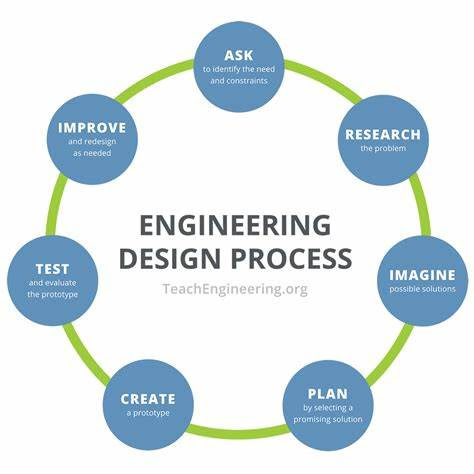
June 4: Engineering Design Process
Today we looked at the engineering design process and then applied it in a quick project.
The project was simply to move an object from one place to another. My group started our project like this:
- Step 1(Define): We choose to move an eraser from one side of the table to the other.
- Step 2(Ask): My group identified what forces we could work with to achieve our goal. We also identified the constraints of time and material.
- Step 3(Imagine): We listed out multiple ideas ranging from a Slingshot to a car.
- Step 4(Plan): Our group choose to make a rubber band powered car. We then drew out our design to see how we could build it.
- Step 5(Create): At this stage we began to build our prototype from the wheels up splitting the work between the three of us.
- Step 6(Test): Finally, once we finished our prototype, we tested our idea.
Final outcome:
Our prototype ended up working pretty well.
It moved the eraser with ease. One thing I noticed
was that it was a little hard to operate correctly
and wouldn't work every time unless a
specific person moved it.
Final design:

For the future:
I learned from this project how to define a problem. I also learned that problems could have many solutions. If I were to continue through the engineering design process and do steps 7(Improve) and 8(Redesign), then I would change the way the rubber band was attached. The way it worked was you have to launch the car by pulling back the car and then releasing both hands at the same time. This is not the best because if you fail to react quickly your hand blocks the car. I would also change the holding place on the car to that our eraser would not go flying out of the car.


Comments
Post a Comment